
One of the good things if you're in Google's blogger is the ability to use Google's vast other products easily such as Google Web Fonts. Google Web Fonts is a free open-source fonts basin. There are lots of fonts available on the said product which is a great option for bloggers. Today I will be teaching you guys on how add or use any fonts from the Google Web Fonts unto your Google's blogger. Its pretty Easy so let's start.

Step #1 ,
visit Google Web Fonts (www.google.com/fonts)

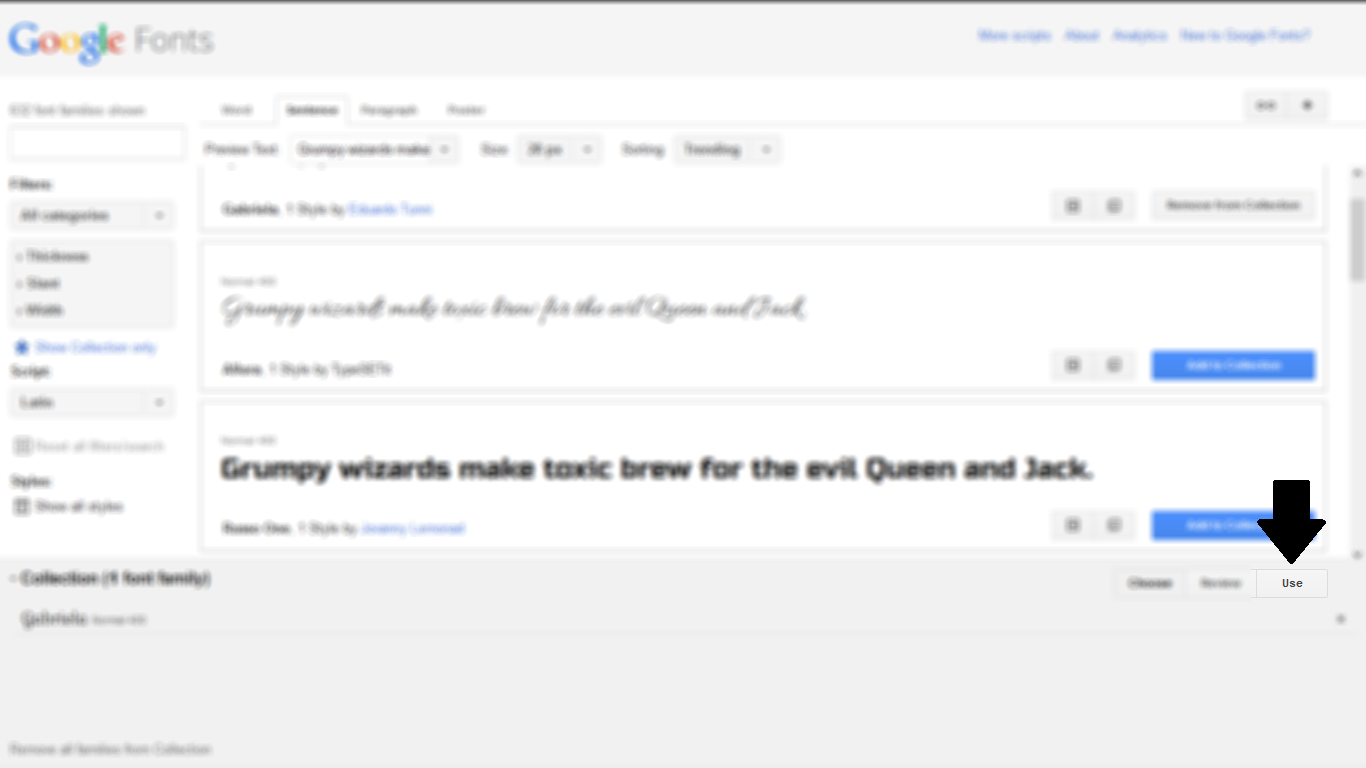
Step #2 Click "Add to Collection" the font you want to use unto your blogger. Take note that you can add many fonts at the same time.

Step #3 If you're happy with your fonts choice click the "Use" button.
Step #4 Scroll down and you'll see an
"Add this code to your website". There are 3 options for you to use the fonts but on this tutorial we will use the standard one.
Step #5 Copy the Code under standard tab.

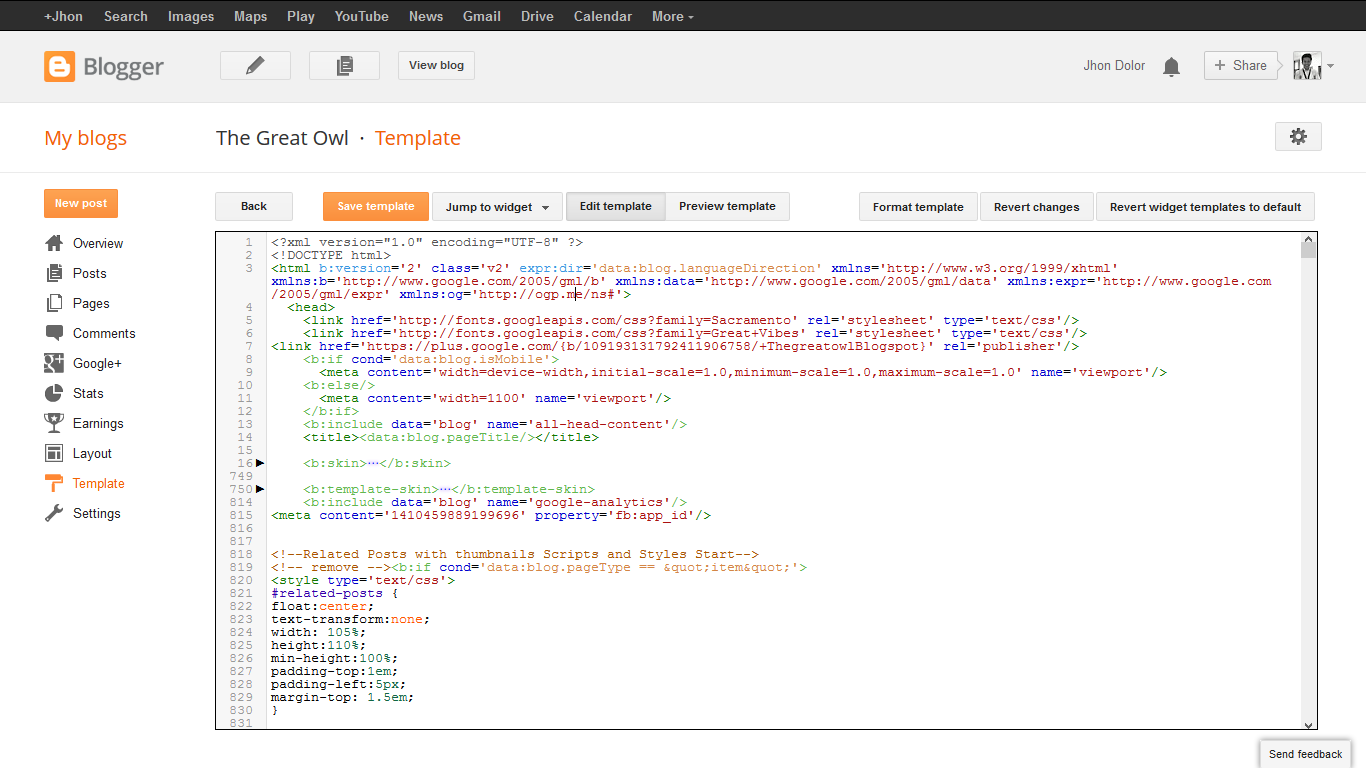
Step #6 Proceed to
Blogger >
Template >
Edit HTML
.png)
Step #7 Search for <head>
Step #8 Paste the code after <head>
HINT! :
<head>
<link href='http://fonts.googleapis.com/css?family=Sacramento' rel='stylesheet' type='text/css'>
Step #9 Remember the code you just pasted? simply put a slash on the end part of it to work.
HINT! :
<head>
<link href='http://fonts.googleapis.com/css?family=Sacramento' rel='stylesheet' type='text/css'>/>
Step #10 save and You're done!